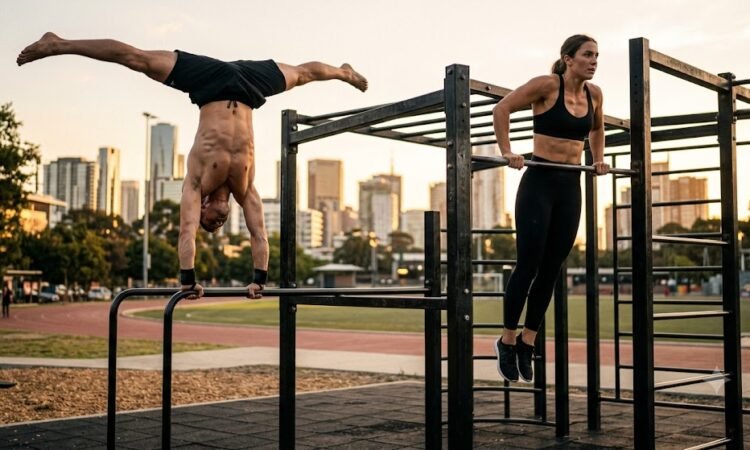
In todays fast world of fitness most popular things in fitness enthusiast is a commercial gym memberships, high-tech smart equipment usage such as automatic treadmills, and complex gym machines to achieve toned body, But, it makes easier in this situation to forget a fundamental truth, the single most effective tool for building a powerful, toned, and athletically physique is already in your reach, you just have to effectively manage your body weight with own efforts and your body builds accordingly.
Let’s explore through this article about the very simple but useful calisthenics workout which not only help you in effectively manage your weight, but also helps to maintain your fitness in very easiest way.
Away from todays social media trend, calisthenics workout, is derived from the ancient Greek words kallos (beauty) and sthenos (strength), this is the ultimate training discipline for developing raw, functional power, rock-solid core body stability, and healthy body joints. Whether your ultimate long-term milestone is to execute an effective muscle-building and your regular fitness goals, injury-resistant body from your living room, this data-backed calisthenics workout plan provides the exact structural plan you must adopt to get succeed in your health goals.
Why to Choose Calisthenics Over Traditional Weightlifting?
While traditional weightlifting improves the specific muscle groups on a fixed motion, But, on the other hand bodyweight strength training will force your entire body structure to function as a co-ordinated system and provides better results. This will create an unique physiological adaptations that traditional weight machines can-not provide:
- True Functional Strength: Calisthenics prioritizes multi-joint mix body movements. By working out with training patterns such as pushing, pulling, and squatting with followed intervals, you can automatically improves your real body dynamics coordination, kinetic balance, and multidimension body awareness.
- Higher Strength: Weightlifting often prioritizes absolute strength such as, how much total weight you can carry or move. But, Calisthenics builds relative strength, how powerful you are in relation to your own body mass. A high level of relative strength translates directly to superior athletic ability and control.
- Minimal Gear, Maximum Freedom: Calisthenics is a simple workout, which, you can do anywhere, it makes you completely freed from commercial gym fees and strict workout schedules. An open floor, a stable doorway pull-up bar, or a local outdoor park may serves as your training playground while following calisthenics.
- Superior Body Core Recruitment: Because your torso is not supported by a padded weight bench or a heavy machine seat, your core body muscular area which including the rectus abdominis, obliques, and transverse abdominis, must actively work during every single set and helps to stabilize your spine.
- Joint Longevity and Structural Mobility: Bodyweight training promotes a natural biomechanical motion’s. This closed kinetic chain approach strengthens our tendons, ligaments, and joint’s while significantly reduces the chronic wear and tear injuries which are associated with heavy barbell workout.
The Core Foundations: Master the 5 Fundamental Movements
Before you go on advanced feats of strength such as handstands, human flags, or front levers, you must establish an ironclad baseline of absolute power through the Big Five foundational calisthenics movements.
- Movement Type: The Push (Horizontal & Vertical), Primary Target Muscles: Pectoralis Major, Anterior Deltoids, Triceps Brachii, Beginner Regression: Incline Wall/Knee Push-Ups, Advanced Goal Milestone: Strict Handstand Push-Ups
- Movement Type: The Pull (Vertical & Horizontal), Primary Target Muscles: Latissimus Dorsi, Rhomboids, Trapezius, Biceps, Beginner Regression: Inverted Australian Rows, Advanced Goal Milestone: Dead-Hang Strict Muscle-Ups
- Movement Type: The Squat (Quad & Glute Dominant), Primary Target Muscles: Quadriceps, Gluteus Maximus, Hamstrings, Beginner Regression: Box-Assisted Air Squats, Advanced Goal Milestone: Free-Standing Pistol Squats
- Movement Type: The Dip (Vertical Push), Primary Target Muscles: Lower Pectorals, Anterior Shoulders, Triceps, Beginner Regression: Bench-Assisted Dips, Advanced Goal Milestone: Weighted Parallel Bar Dips
- Movement Type: The Core Brace (Anterior & Posterior), Primary Target Muscles: Abdominals, Obliques, Erector Spinae, Beginner Regression: Standard Forearm Plank, Advanced Goal Milestone: Hanging Toes-to-Bar / L-Sits
The Science of Progressive Overload Without Weights
The single most common misconception regarding bodyweight strength training is that you cannot trigger specific muscle hypertrophy (growth) because you cannot add more plates to a bar, but today this is myth-driven thinking. As, as per study in calisthenics, you can achieve progressive overloading your workout pattern, by systematically manipulating physics, leverage, and mechanical body disadvantage, without adding extra weight during workout.
To make an exercise progressively harder and continuously stimulate muscle fiber recruitment, utilize these three proven mechanical levers:
- Leverage and Altering Body Angles
Changing your body position shifts to your center of gravity, altering the percentage of your body weight so the specific working muscles must lift. For example, moving from a standard flat push-up to a decline push-up with using your feet elevated on a chair or box, can instantly places a significantly higher percentage of your body weight directly on your upper chest and shoulders.
- Altering Tempo (Time Under Tension)
Instead of rushing through your repetitions, intentionally slow down the eccentric or lowering phase of your body movements. Taking 4 to 5 full seconds to lower your body during a pull-up or dip massively increases your, Time Under Tension (TUT), creating the micro-tears in the muscle tissue required for accelerated growth and repair.
- Reducing Contact Points (Unilateral Training)
Progressively reducing the assistance provided by a secondary limb forces, the primary body muscle group bears the impact of the workout body weight. Progressing from a standard two legged air squat to a single leg pistol squat can results in an instantly doubles the weight placed on the working leg, offering a better stimulus for lower-body hypertrophy.
The 4-Week Basic Calisthenics Workout Plan
This highly balanced, full-body routine is mathematically structured to be performed for 3 times per week on non-consecutive days such as on Monday, Wednesday, Friday. This guarantees at least 48 hours of recovery between sessions, allowing muscle tissue to fully rebuild.
Pre-Workout Warm-Up Routine for 5 to 10 Minutes: Actively perform arm circles, scapular shrugs, wrist mobility stretches, the higher stretch, and 2 full minutes of jumping jacks to improve your body temperature and lubricate the joints.
- Pull-Ups or Inverted Rows: 3 Sets × 6 to 10 Reps.
Start the movement by depressing and retracting your shoulder blades before bending your elbows. Drive your chest upward to the bar. Keep your lower body firm, do not swing your legs or use momentum. Rest for 90 seconds between each sets.
- Bodyweight Squats: 3 Sets × 15 to 20 Reps.
Position your feet shoulder-width apart. Drop your hips back and down until your thighs break parallel with the floor, keeping your heels firmly planted and your chest upright. Take Rest for 60 seconds.
- Standard or Decline Push-Ups: 3 Sets × 8 to 12 Reps.
Maintain a stable straight line from the ctop of your head down to your heels. Ensure your elbows remain tucked at a 45 degree angle relative to your torso to protect the rotator cuff joints from impingement. Take Rest for 90 seconds.
- Parallel Bar Dips or Bench Dips: 3 Sets × 8 to 10 Reps.
Control your Form until your upper arms are perfectly parallel to the ground, then press hard back up to the starting lockout position. Actively push your shoulders down away from your ears. Take Rest for 90 seconds.
- Free Body Hold or Forearm Plank: 3 Sets × 30 to 45 Seconds.
If executing the hollow hold, press your lower back completely flat into the floor, eliminating any arch. If performing the plank, actively squeeze your glutes and tuck your pelvis to fully engage the deep core wall. Take Rest for 60 seconds.
3 Critical Mistakes to Avoid in Calisthenics:
To ensure consistent progression and avoid Stopage, keep an eye out for these three common mystakes that trip up the beginners and intermediates alike:
- Chasing Reps Over Range of Motion (ROM): Performing twenty partial, half-rep push-ups or using higher leg momentum (kipping) on pull-ups earns far less muscle activation than five completely strict, full-range workout repetitions. Focus on absolute control on your form and set.
- Neglecting the Higher Strength Workout Phase: Letting gravity simply drop you down from the top of a pull-up or dip skips half of the exercise. The lowering phase is where the highest amounts of muscular force are generated. Control the stable form on every single workout movement.
- Ignoring Left to Right Imbalances: It is natural for your dominant side to take over during two-handed movements. Keep a close eye on your workout form to ensure your chest, shoulders, and back are pushing and pulling evenly. If you notice a side lagging, then do the correction in body movements to balance out your workout form and strength.
Nutritional Requirement for Calisthenics Success
Building a better physique using your own body weight needs a Intentional approach to recovery and fueling your strength. Because calisthenics is based more on your strength to weight ratio, your nutrition should focus on building healhy muscle mass without adding unnecessary body fat.
- Prioritize High-Quality Protein Intake: To repair the muscle fibers broken down during your workouts, aim to consume roughly 0.8 to 1.0 grams of protein per pound of target body weight daily. Keep your meals added with protein sources such as chicken breast, fish, eggs, tofu, and legumes.
- Time Your Carbohydrates: Carbohydrates are stored in your muscles as glycogen, which serves as the primary fuel source for high-intensity workout’s. Eat Essential carbohydrates rich food such as oats, sweet potatoes, and brown rice for 2 to 3 hours before your workout to ensure maximum body energy.
- Track Your Recovery Schedule: Dynamic bodyweight training puts on a heavy demand on your body’s central nervous system. Combine your diet nutrition with healthy sleep habits, aiming for 7 to 9 hours of quality rest per night to let your muscles and connective tissues recover completely.
Your body is the most advanced piece of fitness equipment than any other gym equipment. Select your ideal progression level, commit to form, and start building functional, head-turning power today.
Mastering the handstand, the ultimate display of vertical pressing balance and the strict muscle-health ie. higher pulling power, requires moving beyond general conditioning. You need to train your nervous system, strengthen your connective tissues, and match the physics of leverage.
This progression plan treats these skills not as simple exercises, but as neurological achevement in your health.
Skill 1: The Freestanding Handstand
The Goal: A 10-second freestanding hold with a straight body line.
Primary Bottlenecks: Wrist extension mobility and shoulder flexion tightness.
- Specific Handstand Warm-Up
Do not kick up with cold joints. Spend 5 to 7 minutes preparing for your wrists and shoulders.
- First-Knuckle Raises (15 sets): Place hands flat on the floor under your shoulders. Keep your fingers flat and lift the palms of your hands up, hinging at the knuckles.
- Wrist Leans (10 sets on each direction): On hands and knees, turn your fingers sideways, then do it backward towards your knees. Gently rock back and forth to stretch the forearms.
- Butcher’s Block Stretch (30-second hold): Place elbows on a bench or chair, hold a PVC pipe or hands together, and drop your head through your arms to open up tight shoulders.
- The Progression Path
- Phase 1: The Frog Stand / Crow Pose: Goal: 30-Second Hold.
Place your hands flat on the floor, balance your knees on the backs of your triceps, and lean forward until your feet lift off the ground. This builds initial wrist stability and teaches your fingers how to press into the floor to balance.
- Phase 2: Chest-to-Wall Handstand: Goal: 45-Second Hold.
Do not kick up backward against the wall. Instead, place your hands on the floor and walk on your feet up the wall backwards. Walk your hands as close to the wall as possible. Look at the wall, look at your hands, press the floor away actively, and tuck your ribs in.
- Phase 3: Wall Scissor Kicks: Goal: Controlled Pull-Offs.
From the chest to wall position, gently extend one leg away from the wall into space. Use your fingertips to press into the floor until the second foot lightly floats off the wall. Alternate legs to find your balance point.
- Phase 4: Kick-Ups & Freestanding Holds: Goal: 10 Second Hold.
Face the wall about 3 to 4 feet away. Step forward, place your hands down, and kick up one leg at a time. Use the wall as a safety net if you over-rotate, but focus on using your fingers like brakes to stay balanced in the center.
- Handstand Accessory Exercises
- Pike Push-Ups (3 sets × 6–8 reps): Put your feet up on a stable box, walk your hands back until your hips are bent at a 90 degree angle, and lower your head forward to create a tripod shape. This builds the overhead shoulder strength needed to press.
- Scapular Shrugs (3 sets × 12 reps): Hang from a bar or push up from the floor, moving only your shoulder blades up and down without bending your elbows.
Skill 2: The Stable Bar Muscle-Up
- The Goal: A smooth pull-off from a dead hang, over the bar, and into a straight-arm dip lockout without using leg momentum (kipping).
- Primary Bottlenecks: The transitional phase, is shifting from pull to push and grip placement.
- Specific Muscle-Up Warm-Up
- Band Pull-Aparts (15 reps): Keep arms straight and pull a resistance band across your chest to fire up the rhomboids and rear delts.
- Scapular Pull-Ups (10 reps): Hang from the bar and pull your shoulder blades down and together without bending your arms.
Wrist Roller or Extensions: Wake up the forearm muscles required to hold a hold grip.
- The Progression Path
- Phase 1: Deep Grip Rows: Goal: 3 Sets × 10 Reps.
Set gymnastic rings or a low bar at chest height. Place the area of your palm directly on the top of the surface and hold it firmly. Lean back and row, keeping your wrists bent over the top of the bar throughout the entire movement.
- Phase 2: High Explosive Pull-Ups: Goal: 5 Strict Reps to Sternum.
Standard pull-ups are not enough. You must practice pulling hard. Aim to pull the bar down past your collarbones, down to your sternum, and eventually down to your upper ribs.
- Phase 3: Assisted Transition (Banded or Feet on Box): Goal: 3 Sets × 5 Reps.
Coil a resistance band around the bar and place your feet or knees in it. Pull aggressively upward and, at the top of the pulling strength, lean your head and chest forward over the bar to practice the rapid transition from a pull to a dip.
- Phase 4: Negative (Eccentric) Muscle-Ups: Goal: 3 Second Slow drop.
Jump or use a box to get to the top support position of a dip over the bar. Lower yourself down through the dip as slowly as possible. When your chest meets the bar, intentionally slower down the position as you shift back into the hanging pull-up position.
- Muscle-Up Accessory Exercises
- Straight-Arm Lat Pulldowns (3 sets × 10 to 12 reps): Using a resistance band anchored overhead, pull down with completely straight arms. This builds the initial raw power which requires to pull the bar down toward your hips.
- Deep Straight-Bar Dips (3 sets × 8 reps): Stand over the bar and lower yourself down until your lower chest touches the metal. This builds strength in the lowest, most vulnerable part of the muscle-up transition.
How to Structure Your Weekly Skill Training
To avoid overtraining your shoulders and wrists, separate these movements or use a dedicated resting period at the beginning of your workouts sets, when your central body nervous system is completely fresh.
Monday (Fresh Strength): Handstand Practice (15 mins) => Full Body Workout
Wednesday (Explosive Focus): Muscle-Up Progression (15 mins) => Full Body Workout
Friday (Volume & Stability): Handstand Practice (10 mins) + Muscle-Up Lowers
Keep your workout sets low in energy & strength, but higher in focus. Treat your workout like practicing an instrument, stop at each set before your form breaks down or your muscles begin to shake.
Mastering the handstand is the ultimate display of vertical pressing balance and, the strict muscle-up ie. the strong pulling power, requires moving beyond the general workout conditioning. You need to train your nervous system, strengthen your joint tissues, and respect the physics of leverage.
This progression plan treats these workout’s not as simple exercises, but as neurological health achievement.
Skill 1: The Freestanding Handstand
The Goal: A 10-second freestanding hold with a straight hollow-body line.
Primary Bottlenecks: Wrist extension mobility and shoulder flexibility and strength.
- Specific Handstand Warm-Up
Do not kick up with unready body joints. Spend 5 to 7 minutes for preparing your wrists and shoulders mobility.
- First-Knuckle Raises (15 sets): Place hands flat on the floor under your shoulders. Keep your fingers flat and lift the palms of your hands up, hinging at the knuckles.
- Wrist Leans (10 sets each direction): On hands and knees, turn your fingers sideways, then backward toward your knees. Gently rock back and forth to stretch the forearms.
- Butcher’s Block Stretch (30 second hold): Place elbows on a bench or chair, hold a PVC pipe or hands together, and drop your head through your arms to open up tight shoulders.
- The Progression Path
- Phase 1: The Frog Stand / Crow Pose: Goal: 30-Second Hold.
Place your hands flat on the floor, balance your knees on the backs of your triceps, and lean forward until your feet lift off the ground. This builds initial wrist stability and teaches your fingers how to press into the floor to balance.
- Phase 2: Chest-to-Wall Handstand: Goal: 45 Second Hold.
Do not kick up backward against the wall. Instead, place your hands on the floor and walk your feet up the wall backwards. Walk your hands as close to the wall as possible. Look at the wall, look at your hands, press the floor away actively, and tuck your ribs in.
- Phase 3: Wall Scissor Kicks: Goal: Controlled Pull-Offs.
From the chest to wall position, gently extend one leg away from the wall into space. Use your fingertips to press into the floor until the second foot lightly floats off the wall. Use Alternate legs to find your balance point.
- Phase 4: Kick-Ups & Freestanding Holds: Goal: 10 Second Hold.
Face the wall about 3 to 4 feet away. Step forward, place your hands down, and kick up one leg at a time. Use the wall as a safety net if you over-rotate, but focus on using your fingers like brakes to stay balanced in the center.
- Handstand Accessory Exercises
- Pike Push-Ups (3 sets × 6 to 8 sets): Put your feet on a box, walk your hands back until your hips are bent at a 90 degree angle, and lower your head forward to create a tripod shape. This builds the overhead shoulder strength which is needed to press.
- Scapular Shrugs (3 sets × 12 sets): Hang from a bar or push up from the floor, moving only your shoulder blades up and down without bending your elbows.
Skill 2: The Stable Bar Muscle-Up
The Goal: A smooth pull-off from a dead hang, over the bar, and into a straight-arm dip lockout without using leg momentum (kipping).
Primary Precautions: The transitional phase of shifting from pull to push and grip placement.
- Specific Muscle-Up Warm-Up
- Band Pull-Aparts (15 reps): Keep arms straight and pull a resistance band across your chest to fire up the rhomboids and rear delts.
- Scapular Pull-Ups (10 reps): Hang from the bar and pull your shoulder blades down and together without bending your arms.
Wrist Roller or Extensions: Wake up the forearm muscles which are required to hold a strong grip.
- The Progression Path
- Phase 1: Deep hold Grip Rows: Goal: 3 Sets × 10 Reps.
Set gymnastic rings or a low bar at chest height. Place the area of your palm directly on the top of the surface with strong grip. Lean back and row, keeping your wrists bent over the top of the bar throughout the entire movement.
- Phase 2: High Energy Pull-Ups: Goal: 5 Strict Reps to Sternum.
Regular pull-ups are not enough. You must practice pulling strongly. Aim to pull the bar down past your collarbones, down to your sternum, and eventually bring down to your upper ribs.
- Phase 3: Assisted Transition (Feet on Box): Goal: 3 Sets × 5 Reps.
Round a resistance band around the bar and place your feet or knees in it. Pull aggressively upward and, at the higher of the pull, lean your head and chest forward over the bar to practice the rapid pull to a lower.
- Phase 4: Negative (Eccentric) Muscle-Ups: Goal: 3-Second Slow Descent.
Jump or use a box to get to the top support position of a lower over the bar. Lower yourself down through the lowest as slowly as possible. When your chest meets the bar, intentionally slow down the transition phase as you shift back into the hanging pull-up position.
- Muscle-Up Accessory Exercises
- Straight-Arm Lat Pulldowns (3 sets × 10 to 12 reps): Using a resistance band anchored overhead, pull down with completely straight arms. This will build the primary required power to pull the bar down toward your hips.
- Deep Straight-Bar Dips (3 sets × 8 reps): Stand over the bar and lower yourself down until your lower chest touches the metal. This will builds strength in the lowest, most vulnerable part of the muscle-up transition.
How to Structure Your Weekly Skill Training
To avoid over exhausting your shoulders and wrists, separate these body movements or use a dedicated worming up session at the beginning of your workouts, which will refresh your your body’s central nervous system.
Calisthenics workout plan, Bodyweight strength training, calisthenics progressions, functional fitness, no-equipment workout, progressive overload bodyweight, muscle hypertrophy calisthenics, relative strength.

Senior Editor, Functional Fitness & Everyday Strength
Qualified B.S. in Exercise Physiology, University of Colorado Boulder | Certified Personal Trainer (ACE)
Jake has been a founding editor at Gymbag since 2018. With over 12 years of coaching experience and a degree in physiology, he specializes in fitness that fits into real life.